Here’s a lesson that begins with common objects that students are familiar with (milk cartons), incorporates giving students time for some hands-on exploration (folding Origami squares), introduces a digital tool to model something I couldn’t do in any other way (thanks to Desmos), and more. I’ve taught the lesson twice and, in this blog, I tell the story of what happened the second time with photos to help describe what actually happened. Enjoy.
Part 1. Comparing Quart and Half-Gallon Milk Containers
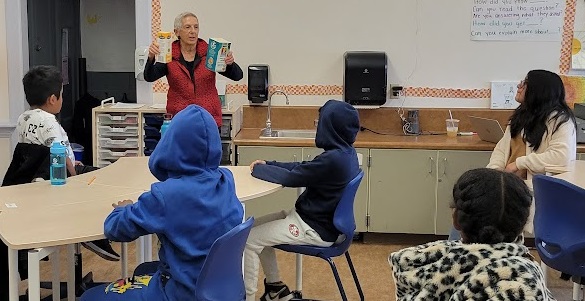
I began the lesson by showing the class two empty milk cartons with their tops cut off and asked, “What’s the same and what’s different about these two cartons?”
Many of the students had ideas to share.
“They’re both milk cartons.”
“One is bigger.”
“The bigger one is the one my mother buys.”
“We get milk in the big jugs with handles.”
“My mom buys orange juice in the smaller size.”
To shift the discussion toward my math goals, I asked another question, “What about how tall the cartons are? How do their heights compare?” (I purposely asked the question in two different ways to use the word “height” in this context.)
“They look the same.”
“They’re as tall as each other.”
“So, they’re the same height,” I said, again to model using the term “height.” I then turned the containers and asked, “What do you notice about the base of each?” The class agreed that both were squares and that the bigger carton had a bigger bottom.
Comparing How Much the Containers Hold
Next, I drew the students’ attention to the capacity of each container. I said, “When you buy milk, how much the container holds is printed on the carton, near the bottom of one side.” I gave the cartons to the students sitting at the table near where I was standing and asked them to read what each said about how much milk it held―32 ounces for the quart and 64 ounces for the half-gallon.
NOTE: I had intentionally chosen these cartons from the variety in the store because they both listed the capacity in ounces. Some cartons also give the volume in metric units―946 ml or .946 l for the quart and 1.89 l for the half-gallon. Some list only the metric units. For this lesson, I focused on ounces only, since 32 and 64 were accessible numbers for the students to reason with mentally, but I think there’s a good math lesson to be built around the metric measures as well.
“How do 32 ounces and 64 ounces compare?” I asked. The students knew that 32 was half of 64 and that 64 was twice as much as 32.
I then asked, “Do you think the smaller carton holds half as much as the bigger carton and that the bigger carton holds two times or twice as much as the smaller one?” Many nodded yes but some weren’t sure.
I took both cartons to the sink, filled the quart container, and poured the water into the half-gallon container. Adriano came up and peered inside the half-gallon container and said in Spanish, “Es la mitad.” Cristnion quickly translated, “It’s half.” (Three of the students in this class are recent arrivals into the United States and are learning English.)
I again filled the quart container and poured the water into the half-filled half-gallon container and filled it. I concluded, again to support the use of the math vocabulary, “So the smaller carton holds half as much as the bigger carton and the bigger carton holds two times or twice as much as the smaller one.” Even though the Spanish-speaking students need as much support as possible learning to speak and understand English, I think this is also valuable reinforcement for native English speakers.
I again showed the students the bottoms of the two cartons. “What about their square bases? How do the areas of these two squares compare?” The only thing the students were sure about was that one square was bigger than the other.
Part 2. Introducing the Desmos Tool for Comparing Squares.
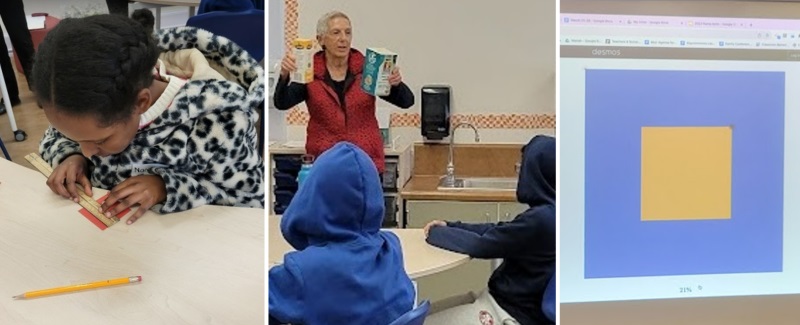
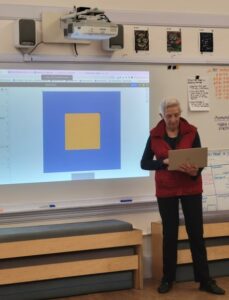
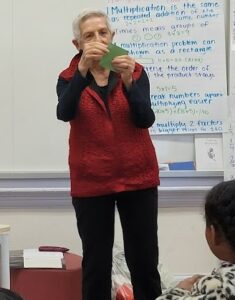
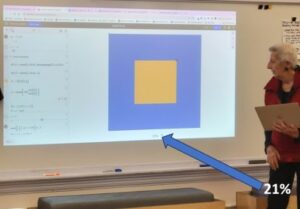
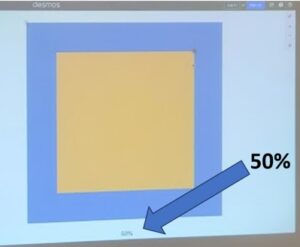
I moved to the side of the room where computer images are projected on a white board and showed them the Desmos tool. I said, “Now I want you to make an estimate about areas of squares.” Below is the image they saw first. (If you’re not familiar with this tool, you can read about it and access it in this blog I wrote: https://marilynburnsmath.com/general-interest/when-is-a-square-half-as-big-as-another-square/.
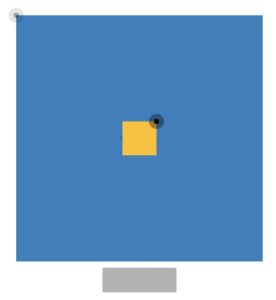
I showed the students how I could drag the black dot at the upper right corner of the yellow square to make the square smaller and larger. Then I made the yellow square teeny and told them I’d slowly increase its size. I said to them, “Call ‘Stop’ when you think that the yellow square is half the size of the blue square.” I dragged the corner slowly and they called, “Stop” when it reached the size shown in the photo below.
If I clicked on the grey bar below the blue square, I knew it would reveal the percent of the yellow square compared to the blue. But I chose not to do that now or even point out that feature. Instead, I closed the computer, told them we’d revisit the tool again soon, and said, “First I’ll give you the chance to do some investigating of squares.”
Part 3. Introducing Origami Squares
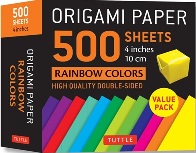
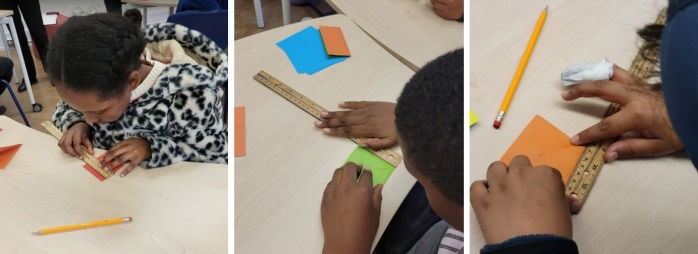
I’m a big believer that hands-on experiences can be useful for helping students develop, cement, and extend their understanding. For this lesson, I had purchased a pack of Origami paper that were 10-centimeter squares. I chose the size because these squares are just about the same size as the square base of a half-gallon milk carton. (More about how that fit into the lesson later in the blog.)
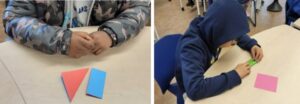
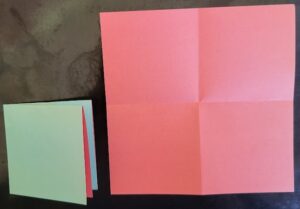
I showed the class the Origami paper and explained, “In a moment, I’ll put a supply on each table so you’ll each be able to experiment with several squares. Here’s what I’d like you to do. Take one Origami square and fold it in half. Then take another square and see if you can fold it another way to show a different shape that’s also half.”
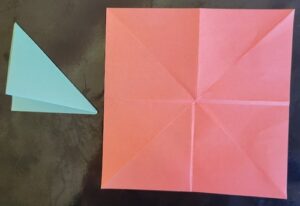
All but one of the students first folded the square in half to show a rectangle. After others noticed how Taya had also folded a square to make a triangle, they followed his lead.
I called the class back to attention and I told them, “You’ll have a chance to do some more folding in a bit, but for now I’d like you to pay attention to how I’m going to fold some Origami squares.” I planned to demonstrate a few more folds so that I could talk about fourths and eighths and also to demonstrate another way to make a half-size square by folding.
More Folds with Origami Squares
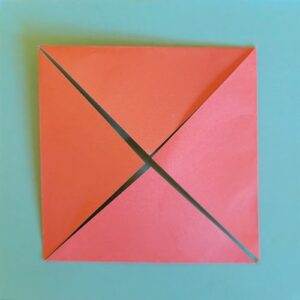
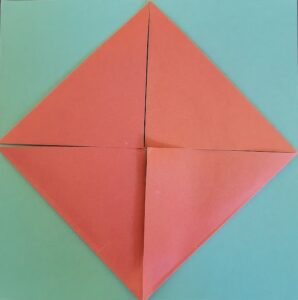
I took one of their folded triangles as shown in the photo above and folded it again to make a smaller triangle. “When I open this up to the original square, how many sections will you see?” Some weren’t sure what I meant, so I opened it and showed them the four triangular sections. “How much is each section?” I asked. They knew each section was one-fourth.
I folded it back into a triangle, folded it again to get the smaller triangle, and then folded it once more in half to make an even smaller triangle. I asked, “How many sections are there now and what size are they?” I opened and we counted the eight triangular sections, each one-eighth of the original square.
I then took one of their folded half-size rectangles and folded it again to make it a smaller square. I asked, “When I open it, how many sections will you see?” They knew there would be four squares. “They’re each a fourth,” Jordan said.
“Now watch carefully while I fold an Origami square in a different way,” I said.
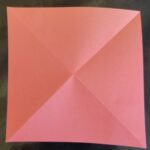
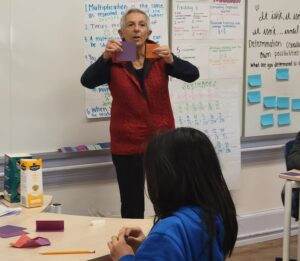
This time I opened the square that I had folded into four smaller squares and pointed out that now I could see the center point of the Origami square. Then I demonstrated four folds, folding each corner carefully to the center of the original square. “It’s a square!” several students called out.
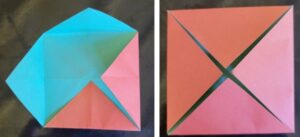
I placed my folded square on an unfolded Origami square the way the yellow square was on the blue square in the Desmos tool.
“I think my folded square is half of the original square,” I said. “I think I’ve shown another way to fold an Origami square to show a smaller square that’s one-half. And I think I can prove it.” I opened the folded square and together we counted the eight triangular sections. Taya said, with amazement, “Your square is four-eighths and that’s a half.” The room broke out into a buzz and students began to fold their squares as I did, some successfully and some not. I let them experiment folding and talking among themselves until I noticed that about half of the students had made a square as I had. Then I called them back to attention.

Part 4. Bringing Measurement into the Exploration
I explained, “The package of Origami paper says that the the squares are 10 centimeters on a side. I think the smaller square I folded is 7 centimeters on a side. Can you check those measurements with a ruler?” They did this quickly.
I next posed two questions, “What’s the area of 10-by-10 Origami square? And what’s the area of the 7-by-7 smaller folded square? Talk about this at your table.” They had previously explored square numbers. (I’ll describe that lesson in another soon-to-come blog.) They agreed that the areas were 100 square centimeters and 49 square centimeters.
Brandon said, “Hey, 49 is just about half of 100. It’s only 1 less than 50.”
Naomi added, “So the smaller square is just about half.”
I again held up the two squares, one on top of the other, and said, “Keep this in mind and let’s look again at the Desmos tool and the estimate you made.”
Back to the Desmos Tool
I opened the computer and projected where we had left off with the Desmos Tool. Some still thought that their estimate was OK and others thought the yellow square should be bigger. I said, “If I click on the grey bar below the blue square, you’ll see what percent of the blue square the yellow square is. What percent should it be if the yellow square is half the blue square?” They knew it was 50%. I clicked and they groaned when they saw that the yellow square was only 21%.
The class watched as I slowly dragged the black point on the upper right corner of the yellow square until the percent in the grey bar reached 50%. There was a buzz while the students talked among themselves about how the two squares looked together.
Another feature of the Desmos tool is that you can rotate the yellow square by dragging the grey point at its upper left corner. The students watched as I did this. And then, to have them think about the area of the yellow square as compared to the blue square as they did with the Origami paper, I drew lines to highlight the four triangles in the yellow square.
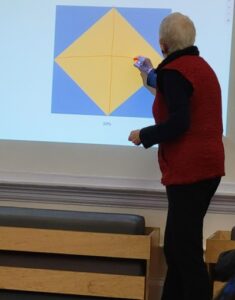
“It’s half,” Jada said. “There are eight triangles all together and the yellow square has four of them.”
Melany added, “That’s four-eighths and that’s one-half.”
Back to the Origami Squares
I reached for an original Origami square and the half-sized square I had folded. I said, “Let’s see if it works the same if I rotate the smaller square.”
I did the same rotation with the two Origami squares, and some students blurted out comments. “It works!” “It’s like the blue and yellow squares.”
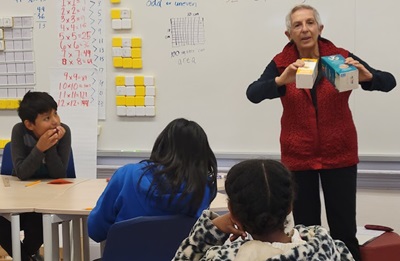
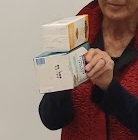
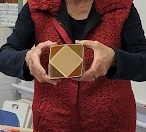
Back to the Milk Cartons
And then I did the same with the two milk cartons, showing how the corners of the rotated quart container fit into the bigger container. It was a BIG WOW. The students were excited and again chattered among themselves.
Part 5. An Individual Assignment
I then gave the students an individual assignment to complete. I knew that I had thrown a slew of math ideas at them and I wanted to give them time to begin processing the experience. Also, I was curious to learn what they had learned.
I showed the students the assignment sheet I had prepared, which I had written on centimeter-squared paper. I showed them that the smaller square I had folded, which was half of the original Origami square, was the same size as the squares I drew on their assignment sheet. I explained, “Both squares on the sheet have sides that are 7 centimeters and areas of 49 square centimeters.”
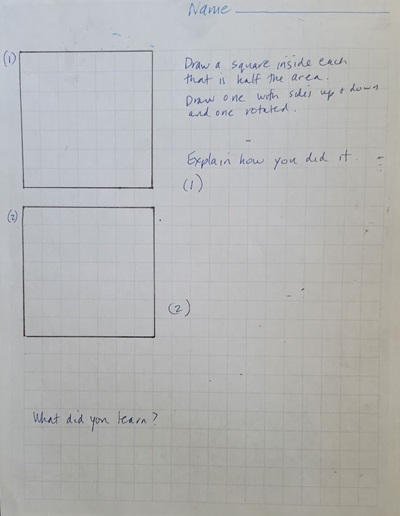
“Here’s your math challenge,” I said. “Inside each of these squares on the assignment sheet, draw a square that’s half as big, so its area is about half of 49 square centimeters. Draw one square in the middle with the sides straight up and down and draw the other square rotated.”
I asked Brandon to say again what he had discovered about the area of the smaller square I had folded. He repeated his idea, “I know that 49 is almost half of 50, so your square is half of 100.”
Anthony blurted out, “A five-by-five square is 25, and that’s half of 50. I can fold the 49 square into a 25 square.”
I revoiced, using the complete mathematical language, “I agree that half of a square that’s 49 square centimeter is just about 25 square centimeters, which would be a square that’s 5 centimeters on a side.” (If Brandon and Anthony hadn’t made their comments, I would have suggested these ideas to the class.)
As I distributed the worksheets, Briana asked, “Is it OK if I write in Spanish?” I agreed. Then the students got to work.
Samples of Student Work
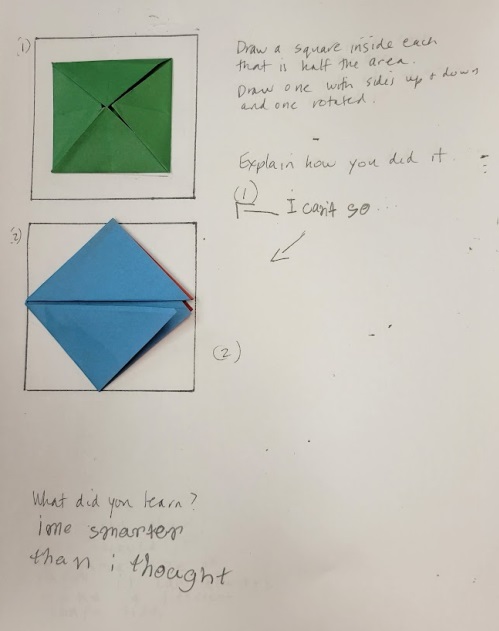
This student first folded Origami paper into 7-centimeter squares and then folded both 7-centimeter squares into squares with half the area. She pasted those onto her paper without referencing the numerical measurements of either.
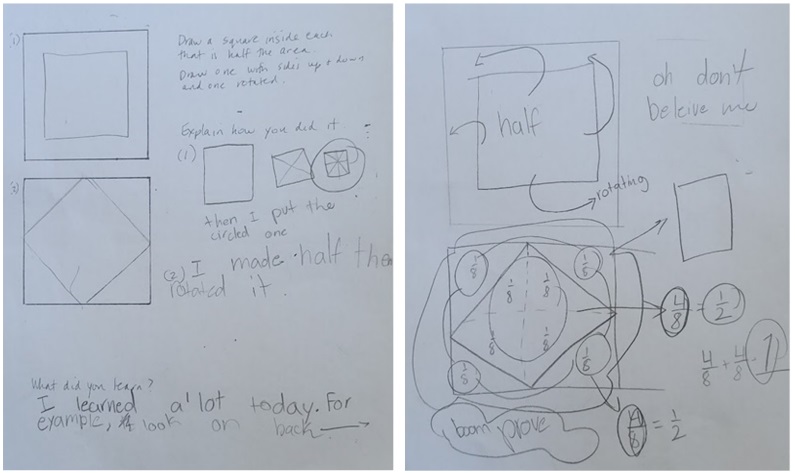
Here are both sides of this student’s paper. On the back, he gave a visual proof of why the rotated square was indeed half of the larger square.
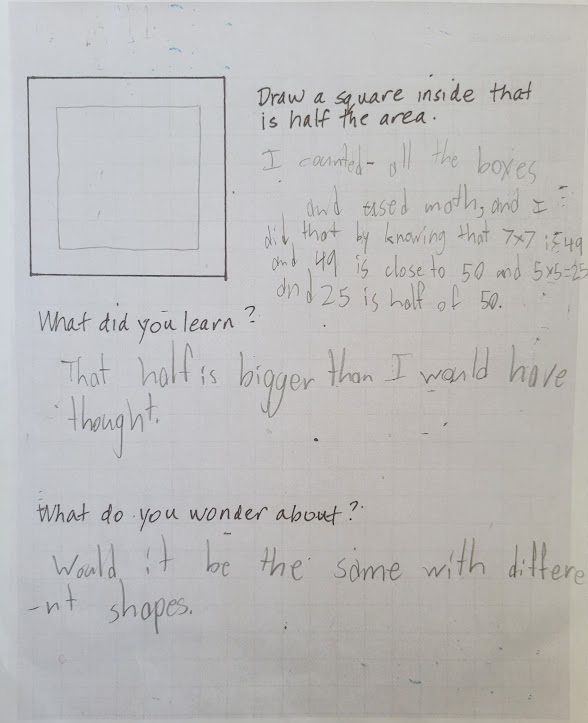
This paper was from a student in the first class where I taught the lesson. I had given this class a slightly different assignment sheet. I chose this paper this because of her explanation about using the numerical area measurement to reason.
A Final Note
I so appreciate all of the support I received from wonderful math colleagues:
> Thanks to Aimie Levin and Mariah Murga for inviting me into their classes.
> Thanks to Jenna Laib for suggesting 7-centimeter squares for the assignment.
> Thanks to Henri Picciotto who came to class when I taught the lesson the first time and suggested that I draw two squares on the assignment sheet, as I did the second time.
> Thanks to Sara Liebert for documenting the lesson with photos.
> Thanks to Eli Luberoff for the awesome digital tool.
It’s so important to collaborate―it’s way too hard to do this work alone.